20240215215031 Raspi 4 Forgejoをインストール
ForgejoとGiteaで、やることは同じ。適宜読みかえて実行すればよい
Forgejoとは
Giteaのfork Forgejo – Beyond coding. We forge.
Giteaとは
Documentation | Gitea Documentation Git+いろいろでgithubのような便利な機能があるやつ。
Gitea is a painless self-hosted all-in-one software development service, it includes Git hosting, code review, team collaboration, package registry and CI/CD. It is similar to GitHub, Bitbucket and GitLab. Gitea was forked from Gogs originally and almost all the code has been changed. See the Gitea Announcement blog post to read about the justification for a fork.
アップグレード
バイナリを入れかえればOK。必要ならバックアップする。 詳細はこちら: Upgrade guide
インストール
- goが必要。 raspi4にgoをインストールする
- MySQL、PostgreSQL、MSSQL、SQLite3、またはTiDB(MySQL プロトコル) が必要です。 sqlite3をインストールした
Installation from binary | Gitea Documentation を見ながらやる。20240407 時点では、Forgejoのインストールドキュメントは未完成っぽい。下記giteaの手順を適宜forgejoに置きかえて実施。
Binary installをする。バイナリは Gitea | gitea から、あたらし目のやつをダウンロード。
Forgejoの場合は リリース - forgejo/forgejo - Codeberg.org
raspi4、5なので linux-arm64 を選ぶ。20240215 時点では、
gitea-1.21.5-linux-arm64 が最新だった。
$ wget https://dl.gitea.com/gitea/1.21.5/gitea-1.21.5-linux-arm64
$ wget https://dl.gitea.com/gitea/1.21.5/gitea-1.21.5-linux-arm64.asc
$ chmod a+x ./gitea-1.21.5-linux-arm64
GPG(giteaの場合のみ)
$ gpg --keyserver keys.openpgp.org --recv 7C9E68152594688862D62AF62D9AE806EC1592E2
gpg: directory '/home/kazbo/.gnupg' created
gpg: keybox '/home/kazbo/.gnupg/pubring.kbx' created
gpg: /home/kazbo/.gnupg/trustdb.gpg: trustdb created
gpg: key 2D9AE806EC1592E2: public key "Teabot <[email protected]>" imported
gpg: Total number processed: 1
gpg:               imported: 1
gitea@saipi4:~ $ gpg --verify gitea-1.21.5-linux-arm64.asc gitea-1.21.5-linux-arm64
gpg: Signature made Thu 01 Feb 2024 21:18:18 JST
gpg:                using RSA key CC64B1DB67ABBEECAB24B6455FC346329753F4B0
gpg: Good signature from "Teabot <[email protected]>" [unknown]
gpg: WARNING: This key is not certified with a trusted signature!
gpg:          There is no indication that the signature belongs to the owner.
Primary key fingerprint: 7C9E 6815 2594 6888 62D6  2AF6 2D9A E806 EC15 92E2
     Subkey fingerprint: CC64 B1DB 67AB BEEC AB24  B645 5FC3 4632 9753 F4B0
git(入ってなかったら入れる)
$ sudo apt install git
$ git config --global user.email "自分のメール"
$ git config --global user.name "自分の名前"
ユーザー git を作成
$ sudo adduser \
   --system \
   --shell /bin/bash \
   --gecos 'Git Version Control' \
   --group \
   --disabled-password \
   --home /home/git \
   git

Adding system user `git' (UID 108) ...
Adding new group `git' (GID 114) ...
Adding new user `git' (UID 108) with group `git' ...
Creating home directory `/home/git' ...
$ sudo visudo
以下を追加
git ALL=(ALL:ALL) NOPASSWD:ALL
Create required directory structure
書いてあるコマンドを実行するには、
 $ sudo -i
root@saipi4:~#
が必要
# mkdir -p /var/lib/gitea/{custom,data,log}
# chown -R git:git /var/lib/gitea/
# chmod -R 750 /var/lib/gitea/
# mkdir /etc/gitea
# chown root:git /etc/gitea
# chmod 770 /etc/gitea
Configure Gitea’s working directory
$ sudo cp gitea-1.21.5-linux-arm64 /usr/local/bin/gitea
Adding bash/zsh autocompletion
Bashを使っているので
$ wget https://raw.githubusercontent.com/go-gitea/gitea/main/contrib/autocompletion/bash_autocomplete
$ sudo cp ./bash_autocomplete /usr/share/bash-completion/completions/gitea
Running Gitea
以下を実行
$ sudo -u git GITEA_WORK_DIR=/var/lib/gitea/ /usr/local/bin/gitea web -c /etc/gitea/app.ini
これで設定画面が LAN内から見える。 自分の場合は http://saipi4.local:3000/
うまくいっているのを確認したら ctrl+cで終了
サービス化 Run as service in Linux | Gitea Documentation を見ながらやる。
$ wget https://raw.githubusercontent.com/go-gitea/gitea/release/v1.21/contrib/systemd/gitea.service
$ sudo cp ./gitea.service /etc/systemd/system/
$ sudo systemctl daemon-reload
$ sudo systemctl enable gitea
Created symlink /etc/systemd/system/multi-user.target.wants/gitea.service → /etc/systemd/system/gitea.service.
$ sudo systemctl start gitea
$ sudo systemctl status gitea
● gitea.service - Gitea (Git with a cup of tea)
     Loaded: loaded (/etc/systemd/system/gitea.service; enabled; preset: enabled)
     Active: active (running) since Thu 2024-02-15 16:47:29 JST; 4s ago
   Main PID: 5531 (gitea)
      Tasks: 9 (limit: 3918)
        CPU: 1.059s
     CGroup: /system.slice/gitea.service
             └─5531 /usr/local/bin/gitea web --config /etc/gitea/app.ini

Feb 15 16:47:29 saipi4 gitea[5531]: 2024/02/15 16:47:29 cmd/web.go:111:showWebStartupMessage() [I] Gitea version: 1.21.>
Feb 15 16:47:29 saipi4 gitea[5531]: 2024/02/15 16:47:29 cmd/web.go:112:showWebStartupMessage() [I] * RunMode: prod
Feb 15 16:47:29 saipi4 gitea[5531]: 2024/02/15 16:47:29 cmd/web.go:113:showWebStartupMessage() [I] * AppPath: /usr/loca>
Feb 15 16:47:29 saipi4 gitea[5531]: 2024/02/15 16:47:29 cmd/web.go:114:showWebStartupMessage() [I] * WorkPath: /var/lib>
Feb 15 16:47:29 saipi4 gitea[5531]: 2024/02/15 16:47:29 cmd/web.go:115:showWebStartupMessage() [I] * CustomPath: /var/l>
Feb 15 16:47:29 saipi4 gitea[5531]: 2024/02/15 16:47:29 cmd/web.go:116:showWebStartupMessage() [I] * ConfigFile: /etc/g>
Feb 15 16:47:29 saipi4 gitea[5531]: 2024/02/15 16:47:29 cmd/web.go:117:showWebStartupMessage() [I] Prepare to run insta>
Feb 15 16:47:29 saipi4 gitea[5531]: 2024/02/15 16:47:29 cmd/web.go:304:listen() [I] Listen: http://0.0.0.0:3000
Feb 15 16:47:29 saipi4 gitea[5531]: 2024/02/15 16:47:29 cmd/web.go:308:listen() [I] AppURL(ROOT_URL): http://localhost:>
Feb 15 16:47:29 saipi4 gitea[5531]: 2024/02/15 16:47:29 ...s/graceful/server.go:70:NewServer() [I] Starting new Web ser>
lines 1-19/19 (END)
再びLAN内からアクセスしてみる。 大丈夫そうならOK。
WEBインターフェースを操作したり、何かを保存など、操作はこの段階でやらないない!
nginxの設定に `virtualhostでgiteaを追加
$ sudo nano /etc/nginx/sites-available/default
# gitea
server {
        listen 80;
        listen [::]:80;
        server_name gitea.kinoshita-lab.org;

        location / {
                client_max_body_size 512M;
                proxy_pass http://127.0.0.1:3000;
                proxy_set_header Connection $http_connection;
                proxy_set_header Upgrade $http_upgrade;
                proxy_set_header Host $host;
                proxy_set_header X-Real-IP $remote_addr;
                proxy_set_header X-Forwarded-For $proxy_add_x_forwarded_for;
                proxy_set_header X-Forwarded-Proto $scheme;
        }
}
nginxを一回止める
$ sudo systemctl stop nginx
gteaの設定を削除(もしあれば)
$ sudo rm /etc/gitea/app.ini
$ sudo rm /var/lib/gitea/data/gitea.db
必要ならトンネルを追加。 20240211141946 Cloudflareでトンネルを作る を参照。
  - hostname: gitea.kinoshita-lab.org
      service: http://localhost
giteaの起動
$ sudo systemctl start gitea
http://[サーバー]:3000 にアクセス
変更した所は以下
- データベースのタイプ: SQLite3
- サイトタイトル: …
- サーバードメイン: pi4.kinoshita-lab.org 「ssh」サーバーのドメイン」であることに注意
- SSHサーバーのポート:
***** - GiteaのベースURL: https://gitea.kinoshita-lab.org/gitea/ ここ重要
- 「アップデートチェッカーを有効にする」: check.
と設定して、 “Giteaをインストール” ボタンを押す。
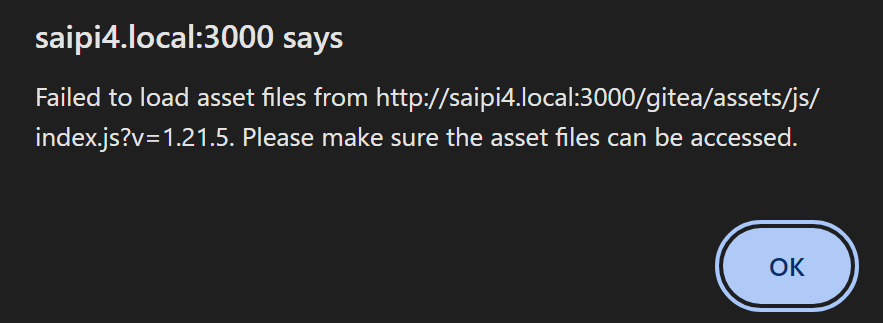
この後は localhost:3000 ではアクセスできないので、こうなる
 nginxをrestart
GiteaのベースURL で設定したURLにアクセス。
こんな感じなら成功。

アカウントを作る。最初に登録した人は管理者になるっぽい。
SSHキーの登録 作成、サインインしたら自分のアイコン→設定 SSH/PGPキー をクリック SSHキーの管理 → sshを公開鍵認証にする で設定したキーをコピペ
勝手にアカウントやリポジトリを作らないようにする
デフォルト設定で動かしてしばらくしたら、勝手にリポジトリが作られたり、アカウントが作られたりしていた。app.iniの [server] セクションに、
DISABLE_REGISTRATION = true
を設定しておいた。これで管理者でないと新規ユーザーが作れなくなった(はず)。
※ forgejo stable 8.0 以降、デフォルトで勝手に作られないようになったみたい。 #3934 - Disable self-registration by default on the install page - forgejo/forgejo - Codeberg.org
Forgejo Runnerを追加
Github actionsみたいなやつ。 設定方法はここに書いてある。 Forgejo Actions administrator guide | Forgejo – Beyond coding. We forge.
app.iniに
[actions]
ENABLED = true
DEFAULT_ACTIONS_URL = https://code.forgejo.org
を追加してForgejoを再起動。
Runner自体は別バイナリになっているので、それをダウンロード。
$ wget -O forgejo-runner.3.5.1  https://code.forgejo.org/forgejo/runner/releases/download/v3.5.1/forgejo-runner-3.5.1-linux-arm64
$ sudo chmod a+x ./forgejo-runner.3.5.1
$ sudo mv forgejo-runner.3.5.1 /usr/local/bin
$ sudo ln -s /usr/local/bin/forgejo-runner.3.5.1 /usr/local/bin/forgejo-runner
.. この後Dockerとか必要なのでまた今度。